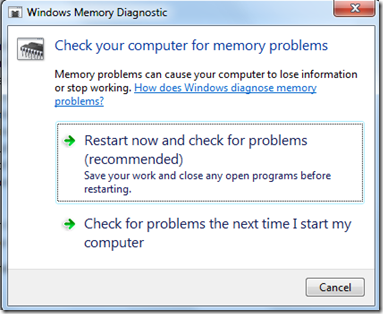
After reading this you will be able to find problems associated with your system/computer RAM. System RAM ( Random Access Memory ) plays a very important role in the functioning of your computer system. A healthy working RAM is responsible for a better performing & stable computer system. If there are some errors in your RAM module/modules that will certainly result in an unstable system that increases the probability of Data Loss. Many STOP or Blue Screen errors in your computer can be caused by faulty RAM.
Windows 7 has a built-in tool to search for these errors. If an error is found you can decide to change the RAM module/s.
To Use Memory Testing Tool in Windows
If you can boot into Windows
- Go to, The start menu
- In the start menu search, type Windows Memory Diagnostic
- Press Enter
OR
- Go to, Start Menu
- Top right corner. select select large icons/small icons
- Locate Windows Memory Diagnostic
Advanced options for running the Memory Diagnostics Tool
It is recommend that you let the Memory Diagnostics Tool run on default settings. However, advanced users might want to adjust the tool’s settings :
- When the Memory Diagnostics Tool starts, press F1.
- You can change these settings settings:
- Test mix. Choose what type of test you want to run: Basic, Standard, or Extended. The choices are described in the tool.
- Cache. Choose the cache setting you want for each test: Default, On, or Off.
- Pass count. Type the number of times you want to repeat the test.
- Press F10 to start the test.
If you are unable to boot into Windows
- Press F8 at the time of boot ( just after pressing the power button on your computer )
- Press the Down Button to select Advanced Start-up options
- Select Windows Memory Diagnostic
- Follow the on-screen instructions

Comments are closed.