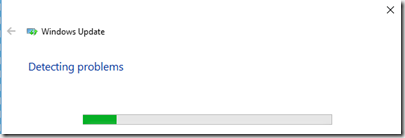
This post will help you use the in built feature of Windows 10 to troubleshoot problems / issues related to Windows update in Windows 10. Generally, Windows update works to get you recommended updates without any critical issues, but sometimes due to different problems, related to network or connectivity, some updates might not install properly or the Windows update service itself might hang or get affected. For such a case Microsoft has programmed a functionality in Windows 10, that’s called the Update Troubleshooter.
Below are the steps to use Usinng Windows 10 Update Troubleshooter
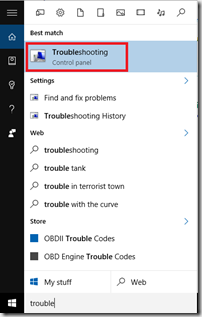
- Go to the Cortana Search
- Type Troubleshooting & Click on Troubleshooting as shown in the Screenshot below
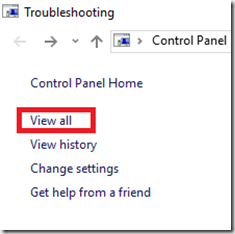
- Now, Troubleshooting options will open within control panel
- On the Left hand pane, Click on View all
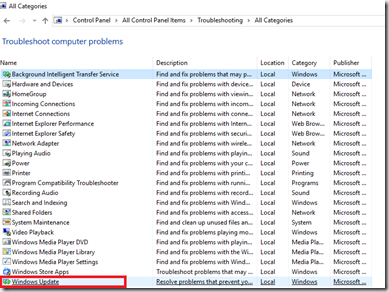
- Now, from the list select the last option
- That says, Windows update
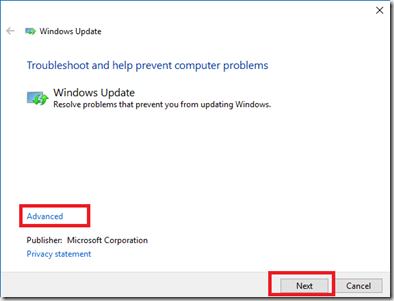
- This option will start the Windows update troubleshooting functionality that has been integrated into Windows 10.
- In this Wizard,
- Click on Advanced,
- Then, click on Apply Repair Automatically
- Click on Run as administrator
- Click on Next.
This will Start the Troubleshooting process and will automatically fix the issues, if any, with your Windows update module.
Hoping that this step-by-step guide for using Windows 10 update troubleshooting was useful for you. If you have any questions or comments, please feel free to use the comments box to send across your query to me, I will answer it as soon as possible.
